


Printing a flyer, business card, or banner only to find it looks blurry or pixelated can be frustrating. This usually happens due to low image resolution, which isn’t always noticeable on digital screens but becomes a major issue in print. While screens can display lower-resolution images clearly, printing requires significantly higher detail for sharp, professional results.
Understanding image resolution is essential to avoid common printing issues. Factors like DPI (dots per inch), image dimensions, and file formats play a crucial role in determining print quality. If an image has insufficient resolution, it may appear jagged or fuzzy, affecting the overall design.
This guide will walk you through identifying low-resolution images, why 300 DPI is the industry standard for printing, and the best ways to fix resolution issues using software and vector conversion. Whether you’re printing marketing materials or personal projects, these tips will help you achieve high-quality results.
What Is Image Resolution?
Image resolution refers to the amount of detail contained in an image, measured in DPI (dots per inch) or PPI (pixels per inch). Understanding these terms is crucial when preparing an image for printing:
- DPI (Dots Per Inch) – Used for printing. A higher DPI means more ink dots per inch, creating a more detailed and clear printed image.
- PPI (Pixels Per Inch) – Used for digital screens. More pixels per inch results in a sharper appearance on screens but does not always translate to print quality.
Why Is 300 DPI Recommended for Printing?
For high-quality prints, an image should be at least 300 DPI. Anything lower than this can result in pixelation, meaning the individual pixels become visible and create a blurry or jagged effect. While digital displays typically operate at 72 DPI, this resolution is too low for print because printers require more detail to reproduce images accurately on paper or other materials.
How Digital Screens Differ from Printing
One reason images that look fine on screens appear blurry when printed is that screens use light (RGB colour model), while printers use ink dots (CMYK colour model). Screens blend colours differently than printed media, meaning images must be optimized separately for each format.
How to Identify Low-Resolution Images
Before printing, it’s crucial to check whether an image has sufficient resolution. Here are a few methods to do this:
1. Zoom Test
- Open the image and zoom in to at least 200%.
- If the image appears blurry or pixelated, it is likely too low in resolution for printing.
2. Check File Size
- Smaller files (under 1MB) usually indicate lower resolution.
- High-resolution images tend to be several megabytes in size due to the amount of detail they store.
3. DPI Check in Editing Software
- Open the image in Adobe Photoshop, GIMP, or an online DPI checker.
- Go to Image > Image Size to check the DPI. If it’s below 300 DPI, it may not print well.
4. Print a Small Test Sample
- Printing a small version of the image on a home printer can help identify quality issues before committing to large-scale printing.
How to Fix Low-Resolution Images for Printing
If your image is low resolution, don’t worry – there are several ways to improve its quality and make it suitable for printing.
1. Use High-Quality Image Sources
The best way to avoid resolution problems is to start with a high-quality image. If possible, use:
- A professional camera (12 megapixels or higher) for sharp, detailed images.
- Stock photo websites like Unsplash, Pexels, or Shutterstock to access high-resolution images.
- RAW format files, which store maximum image detail before compression.
2. Upscale Images Using Editing Software
If you only have a low-resolution image, you can increase its resolution using software tools. However, this method works best when the original image is of decent quality. Here are some options:
Adobe Photoshop:
- Open your image.
- Go to Image > Image Size.
- Change the resolution to 300 DPI and enable Preserve Details 2.0 (if available).
- Adjust the “Reduce Noise” slider to prevent artifacts.
Free Online Upscaling Tools:
- Websites like Let’s Enhance, Upscale.media, and Waifu2x use AI to increase image resolution without causing excessive blur or distortion.
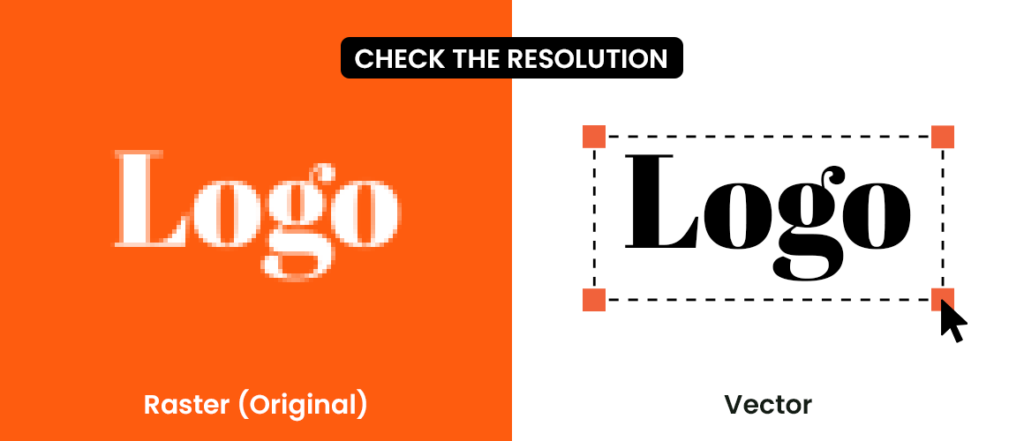
3. Convert Raster Images to Vector Format
If your image consists of logos, text-based graphics, or illustrations, converting it into a vector format is the best way to ensure it prints sharply at any size.
What Are Vector Images?
- Vector images use mathematical equations instead of pixels, so they can be resized infinitely without losing quality.
Best Vector Formats for Printing:
- AI (Adobe Illustrator)
- EPS (Encapsulated PostScript)
- PDF (Portable Document Format)
- SVG (Scalable Vector Graphics)
How to Convert an Image to Vector:
- Use Adobe Illustrator’s Image Trace tool to convert raster images to vector.
- Try free online vectorization tools like Vectorizer.io.
- If unsure, consider professional vectorization services.
4. Save in the Right File Formats
Different file formats affect image quality and suitability for printing. The best formats for print include:
| File Format | Best Use |
| TIFF | High-quality prints with no loss of detail |
| PNG | Great for images with transparency, but large in size |
| Ideal for brochures, posters, and documents | |
| AI/EPS | Best for logos and scalable graphics |
| JPEG | Acceptable for photos but should be saved at maximum quality |
5. Set the Correct Colour Mode
Printers use CMYK (Cyan, Magenta, Yellow, Black), while screens use RGB (Red, Green, Blue). If you print an RGB image, colours may appear different from how they look on your screen.
To ensure accurate colours:
- Convert the image to CMYK mode in Photoshop (Image > Mode > CMYK Colour).
- Request a proof print before finalizing large prints.
6. Ensure Proper Print Dimensions
Before printing, ensure your image dimensions match the required print size:
- If your design is 24 x 36 inches, make sure the file is set to those exact dimensions at 300 DPI.
- Include a bleed area (extra space around edges) to avoid cropping issues.
Common Mistakes to Avoid
Even with a high-resolution image, certain mistakes can ruin the final print quality:
- Using Web Images for Print – Most images found online are only 72 DPI and unsuitable for printing.
- Ignoring Bleed and Margins – If you don’t add extra space around edges, key elements may get cut off.
- Saving in the Wrong Format – Always use print-friendly formats like TIFF, PNG, or PDF.
- Overcompressing the Image – Avoid excessive JPEG compression, which causes loss of detail.
Final Thoughts
High-resolution images are essential for professional-quality printing. Whether you’re creating a banner, business card, or promotional material, ensuring at least 300 DPI, using the right file format, and upscaling images properly can make all the difference.
If you need expert assistance in preparing print-ready images, consider using professional printing and vectorization services to achieve the best results.
Written by BannerBuzz Editorial Team.

 Posted in